Table of Contents
ToggleHow to Maintain and Sterilize Laparoscopic Instruments for Longevity
Laparoscopic surgery, often referred to as minimally invasive surgery, has revolutionized modern healthcare. It enables surgeons to perform complex procedures with smaller incisions, resulting in faster recovery times and a reduced risk of infection. However, the precision and delicacy of laparoscopic instruments demand meticulous care to ensure their longevity and, more importantly, patient safety.
At Lapex Surgical, a leading manufacturer of surgical and laparoscopic instruments based in Sialkot, Pakistan, we recognize the crucial role that proper maintenance and sterilization play in achieving exceptional surgical outcomes. In this comprehensive guide, we’ll walk you through the step-by-step process of cleaning and sterilizing laparoscopic instruments, highlight common mistakes to avoid, discuss recommended sterilization methods, and share expert tips to extend the lifespan of your tools. We’ll also cover regulatory guidelines and answer frequently asked questions to help you maintain your instruments with confidence.
Why Proper Maintenance of Laparoscopic Instruments Matters
Laparoscopic instruments, such as endoscopes, trocars, and graspers, are intricate tools with complex designs, including long, narrow lumens and delicate moving parts. Improper maintenance can lead to corrosion, mechanical failure, or, worst of all, contamination that jeopardizes patient safety. According to the Centers for Disease Control and Prevention (CDC), sterile processing is a cornerstone of infection control in healthcare settings. Contaminated instruments can introduce pathogens, leading to surgical site infections (SSIs), which affect approximately 2-5% of surgical patients in the United States alone. Proper maintenance not only ensures patient safety but also extends the lifespan of these costly instruments, saving healthcare facilities significant expenses in replacements.
At Lapex Surgical, we design our instruments to withstand rigorous use, but their durability depends on how well they are cared for. By following best practices, you can protect your investment, maintain operational efficiency, and uphold the highest standards of patient care.
Step-by-Step Guide to Cleaning and Sterilizing Laparoscopic Instruments
Cleaning and sterilizing laparoscopic instruments is a multi-step process that requires precision and adherence to manufacturer instructions for use (IFUs). Below is a detailed guide to ensure your instruments are safe and ready for the next procedure.
Step 1: Pre-Cleaning at the Point of Use
What to Do: Immediately after surgery, remove gross soil (blood, tissue, or bodily fluids) from the instruments. Use a sterile, lint-free cloth or sponge soaked in sterile water or an enzymatic cleaner to wipe down the instruments.
Why It Matters: Pre-cleaning prevents bioburden (organic material) from drying on the instrument, which can make subsequent cleaning more difficult and increase the risk of corrosion.
Pro Tip: Use a transport gel, such as Pre-Klenz™, to keep instruments moist during transport to the sterile processing department (SPD). This step significantly reduces cleaning time later.
Step 2: Manual Cleaning
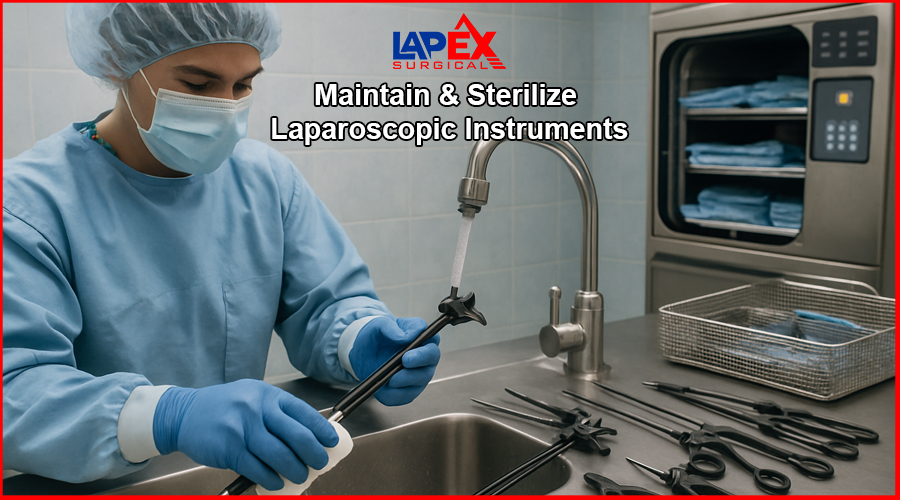
What to Do: Disassemble instruments according to the manufacturer’s IFUs. Use soft brushes and enzymatic detergents designed for laparoscopic instruments to clean all surfaces, especially crevices and lumens. Rinse thoroughly under running water to remove all detergent residues.
Why It Matters: Manual cleaning removes microscopic debris that automated systems might miss. Enzymatic cleaners are particularly effective at breaking down proteinaceous material, ensuring no organic residue remains.
Pro Tip: Use cleaning guns with fine nozzles to flush water through narrow shafts and lumens for thorough cleaning.
Step 3: Ultrasonic Cleaning
What to Do: Place instruments in an ultrasonic cleaner with a neutral pH solution for 10-15 minutes. Ensure instruments are fully submerged and not overlapping to maximize cleaning efficiency.
Why It Matters: Ultrasonic cleaning uses high-frequency sound waves to dislodge debris from hard-to-reach areas, making it up to 16 times more effective than manual cleaning alone.
Pro Tip: Regularly test the ultrasonic cleaner’s efficacy using manufacturer-recommended test strips to ensure optimal performance.
Step 4: Rinsing and Drying
What to Do: Rinse instruments thoroughly in running water to remove all cleaning agents. Dry them using an air gun or a low-temperature oven to prevent water spots and corrosion.
Why It Matters: Residual moisture can lead to rust or microbial growth, compromising sterility. Thorough drying is essential before sterilization.
Pro Tip: Avoid using cloth towels for drying, as they can leave lint that may contaminate instruments.
Step 5: Inspection and Assembly
What to Do: Inspect instruments for damage, corrosion, or wear. Check moving parts for smooth operation and ensure lumens are clear. Reassemble instruments as per the IFUs.
Why It Matters: Damaged instruments can fail during surgery, posing risks to patients and requiring costly replacements.
Pro Tip: Use a borescope to inspect internal channels for residual bioburden or defects, especially in complex instruments.
Step 6: Sterilization
What to Do: Choose an appropriate sterilization method based on the instrument’s material and manufacturer recommendations (see below for details). Package instruments in sterilization wraps or containers that allow sterilant penetration.
Why It Matters: Sterilization eliminates all viable microorganisms, ensuring instruments are safe for patient use.
Pro Tip: Use biological, chemical, and mechanical indicators to monitor sterilization efficacy for each cycle.
Step 7: Storage
What to Do: Store sterilized instruments in a controlled environment with a temperature not exceeding 75°F and relative humidity between 30-60%. Use closed cabinets or sterile wraps to prevent contamination.
Why It Matters: Improper storage can compromise sterility, as moisture or airborne contaminants can infiltrate packaging.
Pro Tip: Ensure instruments are stored at least 8-10 inches off the floor and 18 inches from sprinkler heads to comply with fire codes.
Recommended Sterilization Methods for Laparoscopic Instruments
Laparoscopic instruments vary in their tolerance to heat, moisture, and chemicals. Below is a table summarizing the most common sterilization methods, their applications, and considerations.
Sterilization Method | Description | Best For | Pros | Cons |
|---|---|---|---|---|
Steam Autoclaving | Uses pressurized steam at 121°C for 15 minutes or 134°C for 5 minutes. | Heat-tolerant instruments (e.g., metal graspers, trocars). | Cost-effective, fast, non-toxic. | Not suitable for heat-sensitive instruments. |
Ethylene Oxide (ETO) | Uses gas to sterilize at low temperatures. | Heat-sensitive instruments (e.g., fiberoptic cables, some endoscopes). | Effective for delicate instruments. | Long cycle time, potential toxicity concerns. |
Hydrogen Peroxide Gas Plasma | Uses hydrogen peroxide vapor and plasma to sterilize in 30-60 minutes. | Heat- and moisture-sensitive instruments. | Fast, safe byproducts (water, oxygen). | Limited penetration in long lumens. |
Glutaraldehyde (2%) | Chemical immersion for 10 hours at 25°C. | Lensed instruments, heat-sensitive devices. | Non-corrosive, effective high-level disinfectant. | Long processing time requires thorough rinsing. |
Low-Temperature Steam with Formaldehyde | Combines steam and formaldehyde at low temperatures. | Heat-sensitive instruments in some regions. | Effective for complex instruments. | Toxicity concerns, less common in the U.S. |
Choosing the Right Method
Always consult the manufacturer’s IFUs to determine the appropriate sterilization method. For Lapex Surgical instruments, we provide detailed IFUs to ensure compatibility with autoclaving, ETO, or gas plasma. For example, our heat-resistant hand instruments and trocars are designed for steam autoclaving, while our advanced endoscopes may require low-temperature methods like hydrogen peroxide gas plasma.
Common Mistakes to Avoid During Instrument Cleaning
Even experienced sterile processing technicians can make errors that compromise instrument integrity or patient safety. Here are common pitfalls and how to avoid them:
Skipping Pre-Cleaning: Failing to remove gross soil immediately after surgery allows bioburden to dry, making cleaning harder and increasing corrosion risk. Solution: Always pre-clean at the point of use with enzymatic sprays or gels.
Using Harsh Cleaning Agents: Household detergents or abrasive brushes can damage delicate surfaces. Solution: Use manufacturer-recommended enzymatic cleaners and soft brushes.
Improper Drying: Leaving instruments wet before sterilization can lead to rust or microbial growth. Solution: Use air guns or ovens for thorough drying.
Incorrect Sterilization: Using an incompatible method (e.g., autoclaving heat-sensitive instruments) can cause damage. Solution: Follow IFUs and validate sterilization cycles.
Poor Storage Practices: Storing instruments in humid or open areas can compromise sterility. Solution: Maintain controlled storage conditions and use closed cabinets.
Neglecting Inspection: Failing to inspect for damage or bioburden can lead to surgical complications. Solution: Use borescopes and magnification for thorough inspections.
Tips for Extending the Lifespan of Laparoscopic Instruments
Laparoscopic instruments are a significant investment, and proper care can extend their usable life. Here are expert tips from Lapex Surgical:
Follow Manufacturer IFUs: Always adhere to the specific cleaning and sterilization guidelines provided by Lapex Surgical to avoid voiding warranties or damaging instruments.
Invest in Training: Train sterile processing staff on proper handling, cleaning, and sterilization techniques. Regular training reduces errors and improves outcomes.
Use Protective Trays: Store delicate instruments, such as microsurgical tools, in specialized trays to prevent movement and wear during transport or sterilization.
Regular Maintenance Checks: Schedule routine inspections to identify wear, corrosion, or mechanical issues early. Replace damaged components promptly to avoid costly repairs.
Opt for Ultrasonic Cleaning: Incorporate ultrasonic cleaning into your protocol for superior debris removal, especially for instruments with complex designs.
Monitor Sterilization Cycles: Use biological and chemical indicators to ensure sterilization efficacy and avoid overexposure to harsh conditions that can degrade instruments.
Choose Quality Instruments: Lapex Surgical’s instruments are crafted with precision in Sialkot, using high-grade materials to withstand repeated sterilization cycles without compromising performance.
Regulatory Guidelines for Instrument Maintenance in Healthcare Settings
Compliance with regulatory standards is non-negotiable in healthcare. Below are key guidelines from leading authorities:
CDC Guidelines: The CDC recommends that laparoscopic instruments be sterilized or, at a minimum, high-level disinfected to prevent infections. Sterilization records should be retained for at least three years to comply with Joint Commission standards.
AAMI/ANSI Standards: ANSI/AAMI ST79 provides comprehensive guidance on steam sterilization, including washer indicator testing and cycle validation. ANSI/AAMI ST58 and ST91 cover chemical sterilization and endoscope processing, respectively.
FDA Recommendations: The FDA emphasizes following manufacturer IFUs for cleaning and sterilization to ensure device safety and efficacy.
EN 285 (Europe): For autoclaving laparoscopic instruments with long lumens, use autoclaves with vacuum air removal to ensure thorough steam penetration.
Healthcare facilities must also conduct regular audits and staff training to maintain compliance. Lapex Surgical provides detailed IFUs aligned with these standards to support your sterile processing protocols.
Proper maintenance and sterilization of laparoscopic instruments are critical for patient safety, instrument longevity, and operational efficiency. By following a meticulous cleaning and sterilization process, avoiding common mistakes, and adhering to regulatory guidelines, healthcare facilities can ensure their instruments perform reliably for years. At Lapex Surgical, we’re committed to providing top-quality instruments from Sialkot, Pakistan, designed to withstand rigorous use while meeting the highest standards of care. Invest in proper maintenance practices today to protect your patients and your instruments tomorrow.
For more information about our premium laparoscopic instruments or to request detailed IFUs, visit Lapex Surgical or contact our team. Let’s work together to elevate surgical care.
FAQ: Common Questions About Laparoscopic Instrument Maintenance
Q: How often should laparoscopic instruments be inspected?
A: Instruments should be inspected after each use for damage, corrosion, or bioburden. Routine maintenance checks should occur monthly or per facility policy.
Q: Can all laparoscopic instruments be autoclaved?
A: No, heat-sensitive instruments like endoscopes or fiberoptic cables require low-temperature methods like ETO or gas plasma. Always check the manufacturer’s IFUs.
Q: What is the difference between disinfection and sterilization?
A: Disinfection reduces viable microorganisms but may not eliminate spores, while sterilization destroys all microbial life, including spores. Laparoscopic instruments typically require sterilization.
Q: How can I prevent corrosion on my instruments?
A: Thoroughly dry instruments after cleaning, use enzymatic cleaners, and avoid harsh chemicals. Store in a controlled, low-humidity environment.
Q: Why choose Lapex Surgical instruments?
A: Lapex Surgical, based in Sialkot, crafts high-quality laparoscopic instruments designed for durability and compatibility with modern sterilization methods, ensuring long-term performance and patient safety.