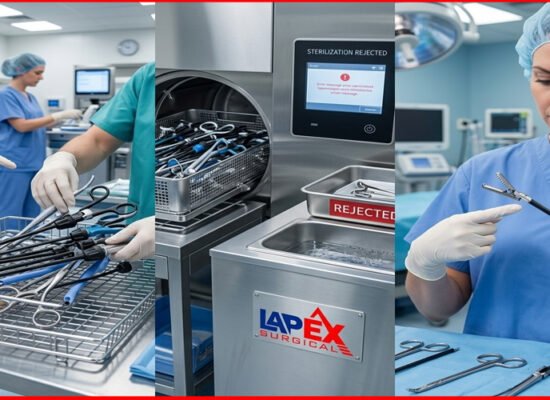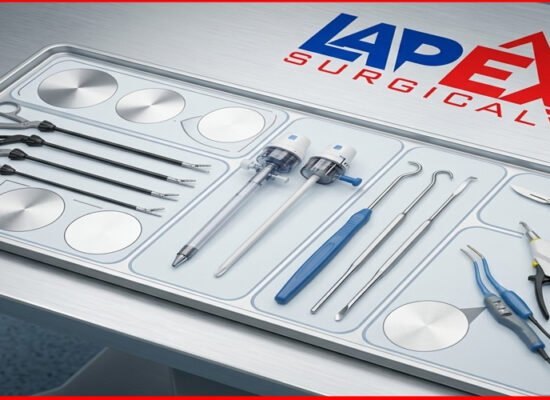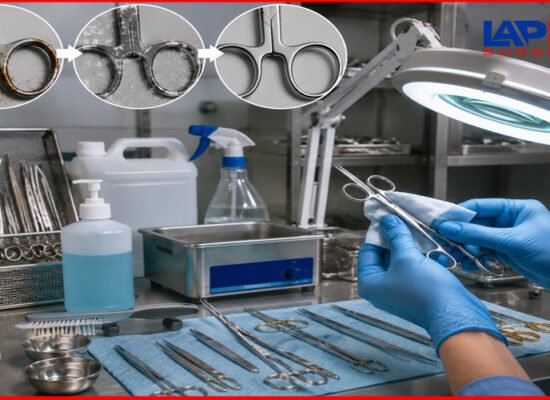
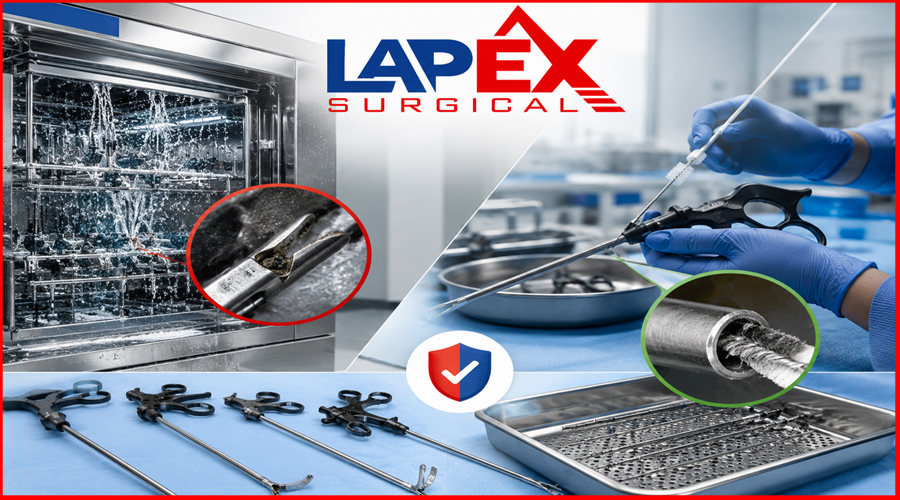
Automated reprocessing alone cannot reliably decontaminate complex laparoscopic shafts. The narrow lumens, hinged joints, insulated sleeves, and multi-component assemblies that define modern laparoscopic instruments create biofilm-harboring dead zones that automated washers simply cannot reach. Manual cleaning — performed by trained sterile processing technicians following evidence-based, manufacturer-validated protocols — is not a legacy habit left over from simpler times. It is an indispensable, non-negotiable first step that directly determines whether subsequent disinfection and sterilization will actually work. Skipping it, or performing it inadequately, is one of the leading root causes of surgical-site infections linked to contaminated instruments. For facilities sourcing high-precision instruments from manufacturers like Lapex Surgical in Sialkot, Pakistan, understanding why manual cleaning matters is as important as the instruments themselves.
The Invisible Risk Inside Every Laparoscopic Shaft
Every year, thousands of minimally invasive surgeries are performed with laparoscopic instruments that look visually clean — yet harbor microscopic colonies of biofilm, residual blood protein, and lubricant deposits deep inside their shafts. The operating room team scrubs, drapes, and preps meticulously. The surgeon operates with precision. And yet, hidden within a 5 mm stainless steel shaft, the seeds of a surgical-site infection may already be present.
This is not a theoretical concern. Multiple peer-reviewed studies and real-world infection cluster investigations have traced postoperative infections directly to inadequately reprocessed laparoscopic instruments — instruments that passed visual inspection, completed automated washing cycles, and were packaged and sterilized. The failure happened long before the autoclave: it happened during cleaning, or rather, the absence of genuine cleaning.
Laparoscopic shafts are architecturally complex. Unlike solid-bodied instruments such as scalpels or scissors, laparoscopic shafts contain internal working channels, electrical insulation layers, rotating components, and articulating joints. Organic material — blood, fat, tissue fragments, irrigation fluid — enters these internal spaces during surgery and begins denaturing within minutes. Once protein denatures and binds to the metal surface, it forms a physical barrier that shields underlying contamination from chemical disinfectants and steam sterilization alike.
This article explains, in precise and practical terms, why manual cleaning remains the essential foundation of laparoscopic instrument reprocessing, how to perform it correctly, what happens when it is done wrong, and why instrument design — from manufacturers like Lapex Surgical — plays a critical role in making effective manual cleaning achievable.
Understanding the Anatomy of Complex Laparoscopic Shafts
Before addressing cleaning protocols, it is worth understanding exactly what makes laparoscopic shafts so challenging to clean.
Key Structural Features That Complicate Cleaning
Narrow lumens: Most laparoscopic shafts range from 3 mm to 12 mm in outer diameter. The internal working channels through which rods, cables, and jaw mechanisms pass are considerably narrower — sometimes less than 1.5 mm in internal diameter. Conventional brushes and automated spray-injection systems cannot always penetrate these channels fully.
Insulated sheaths: Electrosurgical laparoscopic instruments — including monopolar and bipolar forceps and scissors — are covered in electrical insulation (typically PTFE or polyamide coating). This insulation can delaminate, crack, or pit over time, creating micro-cavities that trap organic debris. These areas are invisible to the naked eye and are missed by automated washers.
Multi-component assemblies: A typical laparoscopic grasper shaft disassembles into 6–12 individual components, including the outer tube, inner rod, jaw assembly, rotation knob, and insulation sleeve. Each component has its own surfaces, crevices, and potential contamination points. Many facilities attempt to clean these instruments without fully disassembling them — a practice that guarantees inadequate cleaning.
Articulating and rotating joints: Laparoscopic instruments with articulating wrists or rotating shafts have mechanical joints with micro-gap tolerances measured in fractions of a millimeter. Organic matter that enters these joints during surgery becomes essentially trapped, and neither spray washers nor ultrasonic cleaners can reliably dislodge it without prior manual pre-cleaning and correct brush sizing.
Trumpet valves and stopcocks: Instruments used in combination with insufflation or irrigation systems may contain internal valve mechanisms. These create isolated chambers where contaminated fluid pools and stagnates.
Why Automated Washers Cannot Do the Job Alone
Automated washer-disinfectors (AWDs) are powerful, standardized, and essential components of any modern CSSD (Central Sterile Supply Department). They offer consistency, reduce manual handling time, and achieve validated decontamination results — when the instruments loaded into them are already pre-cleaned.
The critical misunderstanding in many facilities is treating AWDs as primary cleaning devices rather than secondary processing steps. Here is why that misunderstanding is dangerous:
The Protein Fixation Problem
Automated washer cycles typically begin with a cold rinse, then progress to a hot wash phase. If significant organic load (blood proteins, tissue) remains on the instrument during the hot wash phase, heat causes those proteins to denature and bond permanently to the instrument surface. This is known as protein fixation, and once it occurs, no amount of additional washing, disinfection, or sterilization will remove the fixed organic layer.
Manual pre-cleaning removes the bulk organic load before the instrument enters the automated cycle, preventing protein fixation from occurring.
The Lumen Irrigation Problem
AWDs use spray arms and injection ports to force water and detergent through instrument lumens. However, this works reliably only when:
- The lumen is straight and unobstructed
- The lumen diameter is compatible with the injection port
- The instrument is connected correctly to the irrigation port adapters
- The inner lumen surface is not already coated with dried organic debris
Complex laparoscopic shafts frequently fail one or more of these conditions. Studies have found that even in correctly loaded AWD cycles, internal lumens of multi-component laparoscopic shafts showed residual organic contamination in a significant percentage of instruments tested.
The Disassembly Problem
AWDs process instruments as they are loaded. If a multi-component laparoscopic shaft is loaded and assembled rather than disassembled into individual parts, the washer treats it as a single surface object, and the internal interfaces between components receive no meaningful cleaning whatsoever.
The solution is not a better washer. The solution is a trained technician who knows how to disassemble the instrument, clean every component individually, inspect each surface under magnification, and reassemble correctly before the next stage of processing.
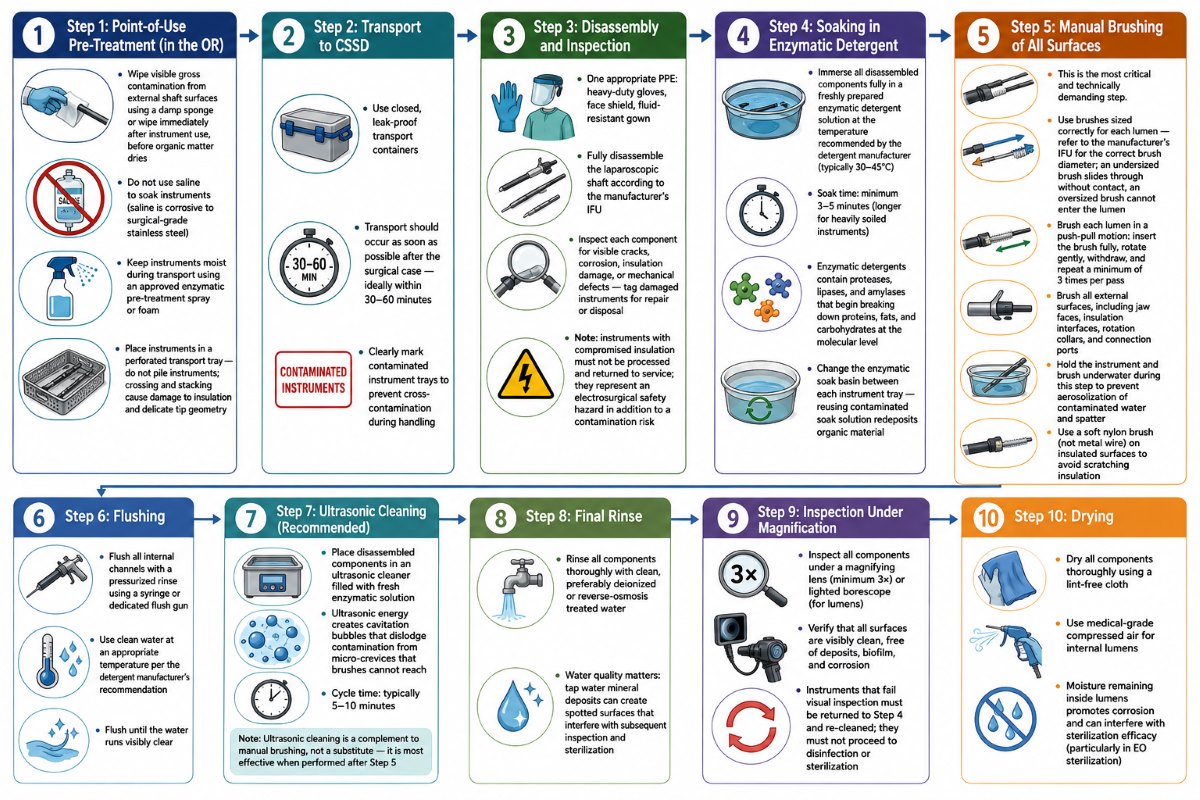
The Manual Cleaning Protocol: Step-by-Step
The following protocol reflects best practices aligned with ISO 17664, AAMI TIR30, and WFHSS (World Forum for Hospital Sterile Supply) guidelines. Always consult the specific instrument manufacturer’s IFU (Instructions for Use) — including those provided by Lapex Surgical — as validated instructions take precedence over generic protocols.
Step 1: Point-of-Use Pre-Treatment (in the OR)
- Wipe visible gross contamination from external shaft surfaces using a damp sponge or wipe immediately after instrument use, before organic matter dries
- Do not use saline to soak instruments (saline is corrosive to surgical-grade stainless steel)
- Keep instruments moist during transport using an approved enzymatic pre-treatment spray or foam
- Place instruments in a perforated transport tray — do not pile instruments; crossing and stacking cause damage to insulation and delicate tip geometry
Step 2: Transport to CSSD
- Use closed, leak-proof transport containers
- Transport should occur as soon as possible after the surgical case — ideally within 30–60 minutes
- Clearly mark contaminated instrument trays to prevent cross-contamination during handling
Step 3: Disassembly and Inspection
- Don appropriate PPE: heavy-duty gloves, face shield, fluid-resistant gown
- Fully disassemble the laparoscopic shaft according to the manufacturer’s IFU
- Inspect each component for visible cracks, corrosion, insulation damage, or mechanical defects — tag damaged instruments for repair or disposal
- Note: instruments with compromised insulation must not be processed and returned to service; they represent an electrosurgical safety hazard in addition to a contamination risk
Step 4: Soaking in Enzymatic Detergent
- Immerse all disassembled components fully in a freshly prepared enzymatic detergent solution at the temperature recommended by the detergent manufacturer (typically 30–45°C)
- Soak time: minimum 3–5 minutes (longer for heavily soiled instruments)
- Enzymatic detergents contain proteases, lipases, and amylases that begin breaking down proteins, fats, and carbohydrates at the molecular level
- Change the enzymatic soak basin between each instrument tray — reusing contaminated soak solution redeposits organic material
Step 5: Manual Brushing of All Surfaces
This is the most critical and technically demanding step.
- Use brushes sized correctly for each lumen — refer to the manufacturer’s IFU for the correct brush diameter; an undersized brush slides through without contact, an oversized brush cannot enter the lumen
- Brush each lumen in a push-pull motion: insert the brush fully, rotate gently, withdraw, and repeat a minimum of 3 times per pass
- Brush all external surfaces, including jaw faces, insulation interfaces, rotation collars, and connection ports
- Hold the instrument and brush underwater during this step to prevent aerosolization of contaminated water and spatter
- Use a soft nylon brush (not metal wire) on insulated surfaces to avoid scratching insulation
Step 6: Flushing
- Flush all internal channels with a pressurized rinse using a syringe or dedicated flush gun
- Use clean water at an appropriate temperature per the detergent manufacturer’s recommendation
- Flush until the water runs visibly clear
Step 7: Ultrasonic Cleaning (Recommended)
- Place disassembled components in an ultrasonic cleaner filled with fresh enzymatic solution
- Ultrasonic energy creates cavitation bubbles that dislodge contamination from micro-crevices that brushes cannot reach
- Cycle time: typically 5–10 minutes
- Note: Ultrasonic cleaning is a complement to manual brushing, not a substitute — it is most effective when performed after Step 5
Step 8: Final Rinse
- Rinse all components thoroughly with clean, preferably deionized or reverse-osmosis treated water
- Water quality matters: tap water mineral deposits can create spotted surfaces that interfere with subsequent inspection and sterilization
Step 9: Inspection Under Magnification
- Inspect all components under a magnifying lens (minimum 3×) or lighted borescope (for lumens)
- Verify that all surfaces are visibly clean, free of deposits, biofilm, and corrosion
- Instruments that fail visual inspection must be returned to Step 4 and re-cleaned; they must not proceed to disinfection or sterilization
Step 10: Drying
- Dry all components thoroughly using a lint-free cloth and medical-grade compressed air for internal lumens
- Moisture remaining inside lumens promotes corrosion and can interfere with sterilization efficacy (particularly in EO sterilization)
Comparison Table: Manual Cleaning vs. Automated Washing for Laparoscopic Shafts
| Factor | Manual Cleaning | Automated Washer-Disinfector |
|---|---|---|
| Internal lumen cleaning | Direct brush contact in all diameters | Effective only in straight, compatible lumens |
| Disassembled component handling | Full cleaning of each individual part | Requires correct disassembly and loading |
| Gross organic load removal | Highly effective (primary stage) | Risk of protein fixation if used first |
| Consistency between technicians | Variable — training-dependent | Highly consistent once correctly loaded |
| Cycle time | 15–30 minutes per tray | 30–90 minutes per cycle |
| Requires trained operator | Yes — critical | Yes — for loading/validation |
| Damage to insulation from brushes | Possible if wrong brush used | Mechanical agitation can also cause damage |
| Detects damage during cleaning | Yes — direct inspection | No |
| Validated to ISO/AAMI standards | Yes (as part of complete process) | Yes (as standalone step with compatible instruments) |
| Best use | Pre-cleaning; complex instruments; initial decontamination | Secondary cleaning; final disinfection |
The Consequences of Inadequate Manual Cleaning
The downstream consequences of skipping or performing inadequate manual cleaning are severe — for patients, for sterile processing staff, and for the institutions responsible for their care.
Sterilization Failure
Sterilization — whether steam, EO (ethylene oxide), or hydrogen peroxide plasma — operates on a principle called the Spaulding Classification, which assumes that the surface to be sterilized is clean. Steam sterilization, for example, requires direct contact between saturated steam and every surface of the instrument. Dried organic deposits or biofilm coatings insulate the metal surface from steam contact, creating microenvironments where spores and pathogens can survive an otherwise adequate sterilization cycle.
The AAMI ST79 standard explicitly states: sterilization cannot be achieved on instruments that are not first thoroughly cleaned. This is not a recommendation — it is a physical reality.
Biofilm Formation
Residual organic debris inside laparoscopic shafts provides both the nutrient substrate and the physical scaffolding for biofilm development. Biofilms — organized communities of bacteria encased in a protective polysaccharide matrix — are up to 1,000 times more resistant to disinfectants than planktonic (free-floating) bacteria. Once a biofilm establishes inside an instrument lumen, it becomes extraordinarily difficult to eradicate through any combination of chemical and thermal treatment.
Surgical-Site Infections
The clinical endpoint of inadequate instrument reprocessing is the patient on the operating table. Surgical-site infections (SSIs) associated with contaminated laparoscopic instruments have been documented in the medical literature across a range of procedures, including cholecystectomy, appendectomy, and gynecological laparoscopy. These infections range in severity from superficial wound infections requiring antibiotic treatment to deep-space infections requiring return to the operating room, extended hospitalization, and in some cases proving fatal.
Regulatory and Legal Consequences
Healthcare facilities that experience SSI clusters linked to instrument reprocessing failures face investigation by regulatory bodies, accreditation consequences, civil litigation, and reputational damage. The root cause in many such investigations is not equipment failure — it is inadequate staff training, deviation from manufacturer IFUs, or failure to perform manual cleaning steps before automated processing.
The Role of Instrument Design in Cleanability
Not all laparoscopic instruments are equally cleanable. Instrument design is a direct determinant of reprocessing success — and this is where the choice of manufacturer matters enormously.
Design Features That Enhance Cleanability
High-quality laparoscopic instruments designed with reprocessing in mind incorporate features that make manual cleaning more achievable:
- Full disassembly capability: Every component that contacts blood or tissue can be separated for individual cleaning
- Smooth internal bore surfaces: Precision-machined lumens with consistent internal diameter and no burrs, ridges, or surface irregularities that trap debris
- Corrosion-resistant materials: Medical-grade 316L stainless steel and titanium alloys resist pitting and surface degradation that accelerates biofilm formation
- Insulation integrity: High-quality insulation materials with consistent adhesion to the shaft, minimizing the risk of delamination-created debris traps
- Transparent or accessible validation: Manufacturer IFUs that specify validated cleaning protocols, brush specifications, and disassembly sequences
Lapex Surgical manufactures its laparoscopic instrument range from medical-grade stainless steel in Sialkot, Pakistan — a region with centuries of precision metalworking heritage and a globally recognized surgical instruments manufacturing industry. Instruments built to high metallurgical and dimensional tolerances are not only more reliable in the operating room — they are also more cleanable in the CSSD.
Design Features That Compromise Cleanability
Conversely, poorly designed or manufactured instruments create reprocessing nightmares:
- Fixed (non-disassembling) shafts that trap organic matter at joint interfaces
- Damaged or peeling insulation with micro-cavities
- Rough or porous internal bore surfaces from imprecise machining
- Proprietary component geometries that make correct brush selection impossible
Staff Training: The Human Element in Instrument Cleaning
Technology — whether the best instrument design or the most advanced washer-disinfector — cannot compensate for inadequately trained sterile processing professionals. Manual cleaning is a skilled technical procedure, not a simple wash-and-rinse operation.
Core Competencies for CSSD Technicians Handling Laparoscopic Instruments
- Knowledge of laparoscopic instrument anatomy and component identification
- Competency in full disassembly and reassembly of all instrument types in service
- Correct brush selection for each lumen size and instrument type
- Enzymatic detergent preparation and concentration verification
- Visual and borescope inspection skills
- Documentation of cleaning, inspection results, and instrument tracking
- Recognition of instrument damage that requires removal from service
The Cost of Undertrained Staff
In facilities with high instrument turnover and staffing pressures, sterile processing is often underprioritized. Technicians may lack specific training on laparoscopic instruments, may not have access to correct brush sizes, or may be under time pressure that shortcuts the manual cleaning step. These conditions create systematic reprocessing failures that accumulate over time until a cluster of infections triggers investigation.
Investment in CSSD staff training, correct equipment, and adequate time allocation for manual cleaning is not overhead — it is patient safety infrastructure.
Frequency and Maintenance Considerations
Manual cleaning requirements do not vary based on how visually soiled an instrument appears after a case. The principle of standardized processing requires that every instrument undergo the full manual cleaning protocol after every use, regardless of the subjective assessment of contamination level. Light cases still introduce organic material into instrument lumens. A laparoscopic shaft used for a five-minute diagnostic procedure requires the same reprocessing rigor as one used in a complex three-hour surgical intervention.
In addition to post-use cleaning, laparoscopic instruments require:
- Periodic inspection by biomedical engineering for insulation integrity testing (using approved insulation testers, not visual inspection alone)
- Lubrication of mechanical joints per the manufacturer’s IFU using instrument-grade (not mineral-based) lubricants
- Documentation of repair history, reprocessing cycle counts, and retirement from service at the manufacturer-specified end-of-life
Summary Table: Common Manual Cleaning Errors and Their Consequences
| Error | Root Cause | Consequence |
|---|---|---|
| Skipping pre-treatment at point of use | Time pressure; lack of OR staff training | Organic matter dries and fixes to shaft surfaces |
| Cleaning assembled instruments | Staff unfamiliarity with disassembly | Internal component interfaces receive no cleaning |
| Using wrong brush size | Inadequate equipment inventory | Lumen walls not contacted; cleaning ineffective |
| Reusing enzymatic soak solution | Cost-cutting; time pressure | Organic matter redeposited on clean surfaces |
| Brushing outside water surface | Lack of training | Aerosolized contamination; occupational exposure risk |
| Skipping inspection step | Time pressure | Damaged or visibly contaminated instruments reach sterilization |
| Insufficient rinsing | Time pressure | Detergent residue interferes with sterilization |
| Skipping drying | Time pressure | Moisture promotes corrosion and interferes with sterilization |
Frequently Asked Questions (FAQ)
Q1: Can’t a washer-disinfectant do everything an automated and manual cleaning can do?
No. Washer-disinfectors are validated for specific instrument types and configurations under ideal loading conditions. For complex laparoscopic shafts — particularly those with narrow lumens, insulation, and multi-component construction — AWDs alone are insufficient. They are most effective as a secondary step following thorough manual pre-cleaning and disassembly. Multiple regulatory and professional standards bodies, including AAMI, ISO, and the CDC, specify that manual cleaning is required before automated processing for complex instruments.
Q2: How do I know what size brush to use for a laparoscopic shaft lumen?
The instrument manufacturer’s IFU (Instructions for Use) should specify the correct brush diameter for each lumen. As a practical rule, the correct brush diameter should provide gentle resistance during insertion — if the brush slides in without any contact pressure, it is too small; if it cannot enter, it is too large. Facilities should maintain a comprehensive brush inventory covering the full range of lumen sizes in their instrument inventory, and brushes should be replaced regularly to ensure effective contact.
Q3: Does ultrasonic cleaning replace manual brushing?
No. Ultrasonic cleaning is highly effective at dislodging contamination from micro-crevices and irregular surfaces through cavitation, but it requires the gross organic load to be removed first by manual brushing. Used after manual brushing and enzymatic soaking, ultrasonic cleaning is an excellent complement. Used as a substitute, it leaves residual contamination in lumens and on surfaces that the ultrasonic energy could not reach.
Q4: How quickly does organic material become difficult to remove from laparoscopic shafts?
Blood proteins begin denaturing and binding to metal surfaces within minutes at room temperature. The drying process accelerates adhesion significantly. This is why point-of-use pre-treatment (wiping and applying an enzymatic foam or spray) immediately after instrument use is not optional — it is the first and arguably most important step in the entire cleaning process. Instruments that are allowed to dry before cleaning require significantly more manual effort to clean adequately and may reach sterile processing in a state where effective cleaning is impossible.
Q5: Is stainless steel always the best material for laparoscopic shafts from a cleanability standpoint?
Medical-grade 316L stainless steel, when properly machined and finished, offers excellent cleanability due to its smooth surface characteristics, corrosion resistance, and compatibility with a wide range of enzymatic detergents and sterilization methods. Titanium alloys are also used and offer similar advantages with reduced weight. The critical factor is not just the base material but the precision of manufacture — rough, porous, or irregularly machined surfaces trap contamination regardless of material. This is why sourcing instruments from precision manufacturers, such as Lapex Surgical in Sialkot, matters for reprocessing outcomes.
Q6: How does insulation damage affect the cleaning process for electrosurgical laparoscopic instruments?
Damaged insulation on electrosurgical instruments creates multiple problems for reprocessing. Cracks, pitting, and delaminated areas trap organic debris that is virtually impossible to remove by any cleaning method. These same areas also create active electrical hazards during use, as compromised insulation can allow current to escape to unintended tissue. Instruments with damaged insulation should be identified during the inspection step of manual cleaning, tagged out of service immediately, and sent for repair or replacement. Insulation testing with a dedicated instrument insulation tester should be performed regularly — not only during cleaning inspection but as a scheduled maintenance activity.
Q7: What is biofilm, and why does it matter for laparoscopic instrument reprocessing?
Biofilm is a structured community of bacteria that adheres to surfaces and encases itself in a self-produced matrix of polysaccharides, proteins, and DNA. Biofilms can develop inside laparoscopic shaft lumens when residual organic matter from inadequate cleaning provides the initial adhesion surface and nutrient source. Once established, biofilms are extremely resistant to both chemical disinfectants and sterilization — studies have shown biofilm communities surviving exposures that would readily kill planktonic bacteria of the same species. The only reliable strategy against biofilm in surgical instruments is preventing it from forming in the first place — through consistent, thorough manual cleaning after every use.
Q8: Are single-use laparoscopic instruments the solution to reprocessing challenges?
Single-use laparoscopic instruments eliminate the reprocessing challenge by removing the reuse element. They are an appropriate solution in specific clinical contexts, particularly for instruments with high reprocessing failure risk or when reprocessing infrastructure is limited. However, single-use instruments have a significant environmental impact, a higher per-procedure cost, and in many regions are not available for the full range of laparoscopic procedures. Reusable instruments from precision manufacturers with effective reprocessing programs remain the standard approach in most healthcare systems globally, and when correctly cleaned and maintained, they provide equivalent safety at substantially lower life-cycle cost.
Manual Cleaning Is Not Optional — It Is the Foundation
The evolution of surgical instrument design has brought extraordinary capabilities to minimally invasive surgery. Laparoscopic procedures that once required open incisions are now performed through 5 mm ports with precision instruments navigated by skilled surgeons. This progress has been matched by advances in instrument manufacturing — tighter tolerances, better materials, more complex and capable designs.
But complexity comes with a reprocessing obligation. The same features that make modern laparoscopic shafts capable of intricate surgical tasks — narrow lumens, insulated sheaths, multi-component assemblies, articulating joints — make them inherently more challenging to clean. And cleaning, as this article has argued in detail, is not merely a preliminary step. It is the determinant of whether every subsequent stage of reprocessing — disinfection, sterilization, packaging — will succeed or fail.
Manual cleaning by trained, knowledgeable sterile processing professionals remains the only reliable method for removing organic contamination from complex laparoscopic shafts before automated processing. No washer-disinfector, regardless of its technical sophistication, can substitute for a trained technician with correctly sized brushes, fresh enzymatic detergent, a properly lit inspection station, and an understanding of exactly what they are cleaning and why it matters.
For surgical facilities, the investment in CSSD infrastructure, staff training, correct equipment, and the time needed to perform manual cleaning correctly is not overhead — it is a fundamental patient safety commitment.
For instrument manufacturers, the design choices made in Sialkot, Germany, the United States, or anywhere else where surgical instruments are produced have direct implications for how cleanable those instruments will be in use. Lapex Surgical builds its laparoscopic instruments with the understanding that a surgical instrument’s life cycle extends well beyond the operating room — into the hands of the sterile processing technician who ensures it is safe for the next patient.
Manual cleaning is the first line of defence in that mission. It is still essential. It will remain essential. And the facilities that take it seriously are the ones whose patients can be confident that the instruments entering their bodies are genuinely, verifiably clean.
About Lapex Surgical
Lapex Surgical is a Sialkot, Pakistan-based manufacturer of precision surgical, electrosurgical, plastic surgery, and laparoscopic instruments, serving healthcare facilities and surgical distributors worldwide. Our instruments are manufactured from medical-grade stainless steel and titanium alloys to exacting tolerances, with reprocessability built into every design decision. We provide complete IFUs, validated cleaning protocols, and technical support for all our laparoscopic instrument ranges.
For product catalogues, OEM partnerships, or technical enquiries, visit our website or contact our sales team directly.