5 Costly Mistakes That Damage Laparoscopic Instruments (And How to Prevent Them)
Laparoscopic instruments break down for five main reasons: rough handling, bad cleaning habits, wrong sterilization methods, poor storage, and skipping inspections. Each mistake costs your hospital or clinic real money. A single damaged grasper or scope can cost thousands of dollars to repair or replace. Worse, a failed instrument during surgery can put a patient at risk.
The good news? Almost every one of these problems is preventable. This guide breaks down each mistake that damages laparoscopic instruments, explains why it happens, and gives you clear steps to stop it. We’ll also cover electrosurgical insulation breakdown, surgical tool reprocessing errors, and mechanical fatigue in graspers- the exact issues that quietly drain OR budgets every year.
Why Laparoscopic Instrument Care Matters So Much
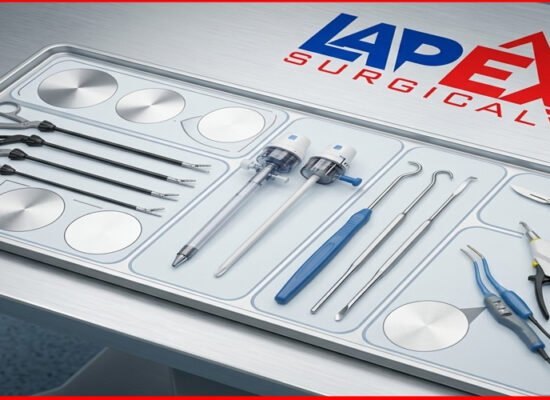
Laparoscopic tools are small, complex, and expensive. A single set of graspers, scissors, and trocars can cost more than a used car. Unlike open-surgery tools, these instruments have tiny moving parts, delicate insulation, and long, thin shafts that bend easily.
When these tools get damaged, three things happen:
- Repair costs go up. Fixing a bent shaft or replacing insulation isn’t cheap.
- Surgeries get delayed. A backup instrument may not be ready.
- Patient safety drops. A cracked insulation layer can cause an electrical burn nobody sees until it’s too late.
Sterile Processing Department (SPD) teams and OR managers are often the last line of defense. Knowing the top five mistakes that damage laparoscopic instruments helps every team member, from surgical techs to biomedical engineers, protect the hospital’s investment.
Think about how many hands touch one instrument in a single day. A surgical tech uses it in the OR. A nurse hands it off. An SPD tech cleans it. A biomed engineer tests it. Then it goes back into rotation for the next case. Every single handoff is a chance for damage to happen, or a chance to catch a problem before it gets worse. That’s why instrument care can’t rest on just one department. It has to be a team effort from the operating table all the way to the sterilization unit.
Mistake #1: Rough Handling and Improper Transport
What Goes Wrong
Laparoscopic instruments are tougher than they look, but they’re not invincible. Many instruments arrive at SPD tossed into bins, stacked on top of each other, or dropped during transport. This causes:
- Bent shafts
- Misaligned jaws on graspers and scissors
- Cracked handles
- Scratched lenses on scopes
A bent shaft might seem minor. But even a slight curve can throw off the tool’s precision during surgery. Surgeons need instruments that move exactly as expected. A warped tip can mean the difference between a clean grasp and torn tissue.
How to Prevent It
| Action | Why It Helps |
|---|---|
| Use dedicated trays with foam inserts | Keeps instruments separated and cushioned |
| Train staff on one-instrument-at-a-time handling | Reduces accidental drops and collisions |
| Avoid stacking heavy trays on delicate scopes | Prevents crush damage to lenses |
| Use rigid transport containers, not open bins | Shields tools from bumps in transit |
Quick tip: Treat every laparoscopic instrument like a fragile telescope, because that’s basically what it is.
A Closer Look at Transport Damage
Transport damage often happens outside the OR, where nobody is watching closely. A cart rolling over a bumpy hallway floor can jostle instruments enough to nick a delicate tip. A tray carried without a lid can catch on a doorway. None of these moments look dangerous in the moment. But they add up.
Some hospitals now use padded, wheeled transport carts built specifically for laparoscopic trays. These carts keep instruments locked in place during movement, cutting down on shaft bending and lens scratches. If your facility still uses open trays or shared carts for multiple instrument types, it may be worth the investment to switch. The upfront cost of a proper cart is far lower than the cost of repairing even one damaged scope.
Mistake #2: Delayed or Incorrect Cleaning (Surgical Tool Reprocessing Errors)
What Goes Wrong
This is one of the biggest causes of long-term damage. If blood, saline, or tissue debris dries onto an instrument, it turns into a stubborn crust. This crust can:
- Clog small lumens (the hollow channels inside instruments)
- Corrode metal surfaces
- Damage the insulation coating on electrosurgical tools
- Create a breeding ground for bacteria, risking infection
Reprocessing errors often happen because of time pressure. Between surgeries, teams rush. Someone skips the pre-soak step. Someone uses the wrong brush size for a narrow channel. Someone forgets to flush a lumen before it dries.
The Right Reprocessing Steps
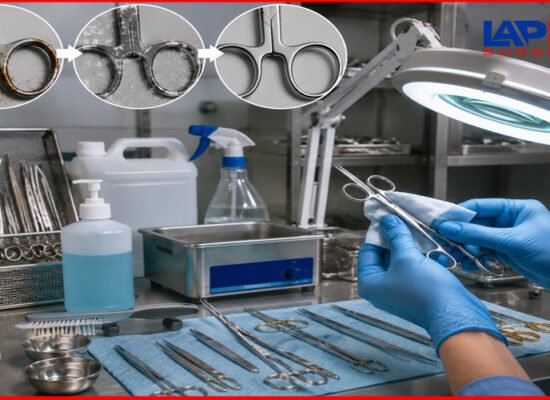
- Point-of-use treatment. Wipe down instruments immediately after surgery. Keep them moist until full cleaning begins.
- Disassemble fully. Take apart every instrument with removable parts. Hidden debris hides in joints and hinges.
- Manual cleaning first. Use enzymatic detergent and the correct brush size for each lumen.
- Rinse with purified water. Tap water can leave mineral deposits that damage surfaces over time.
- Inspect under magnification. Look for leftover debris before sterilization.
Why This Matters for Electrosurgical Tools
Electrosurgical insulation breakdown often starts small. A tiny scratch or pinhole in the insulation lets electrical current leak out during surgery. This is called “stray energy,” and it can burn tissue far from the surgical site without anyone noticing right away.
Improper cleaning, like scrubbing too hard with abrasive pads, is a leading cause of insulation damage. Always use soft brushes and manufacturer-approved cleaning agents on insulated shafts.
Common Cleaning Errors to Watch For
Even experienced SPD techs can fall into bad habits under pressure. Here are a few errors that show up again and again:
- Using the wrong detergent. Not all enzymatic cleaners are safe for every instrument material. Always match the detergent to the manufacturer’s IFU.
- Skipping the timer. Enzymatic soaks need a set amount of time to work. Rushing this step leaves debris behind.
- Reusing dirty water. Water that has already cleaned one tray shouldn’t be used for the next. Cross-contamination and buildup both become risks.
- Forgetting hinge areas. Debris loves to hide in hinges, ratchets, and box locks. A quick wipe won’t reach these spots.
- Not drying instruments fully before sterilization. Leftover moisture can interfere with sterilization effectiveness and promote corrosion.
Fixing these small habits takes very little time but makes a huge difference in instrument lifespan.
Mistake #3: Improper Sterilization of Laparoscopic Tools
What Goes Wrong
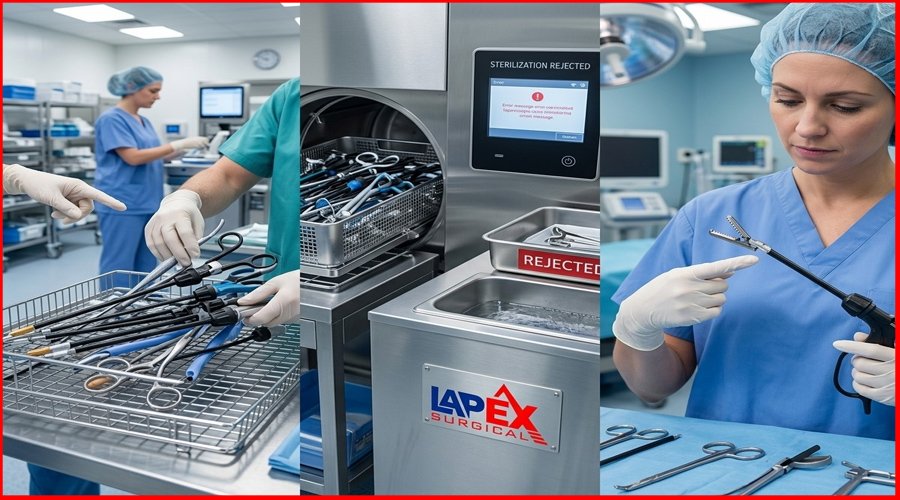
Sterilization sounds simple: kill the germs, done. But laparoscopic instruments are picky. Many are heat-sensitive, moisture-sensitive, or have complex internal parts that trap steam or gas.
Common sterilization mistakes include:
- Using steam sterilization on heat-sensitive components
- Overloading the sterilizer tray, blocking proper steam or gas flow
- Ignoring manufacturer instructions for cycle time and temperature
- Skipping validation checks (biological or chemical indicators)
- Using the wrong sterilization method for a specific instrument type
Sterilization Method Comparison
| Method | Best For | Risk If Misused |
|---|---|---|
| Steam (Autoclave) | Heat-tolerant metal instruments | Warping heat-sensitive parts, lens damage on scopes |
| Ethylene Oxide (EtO) | Heat- and moisture-sensitive instruments | Long cycle times; toxic residue if aeration is skipped |
| Hydrogen Peroxide Plasma | Delicate, lumened instruments | Won’t penetrate long, narrow lumens without adapters |
| Liquid Chemical Sterilants | Emergency turnaround, delicate scopes | Requires precise soak time; corrosion risk if exceeded |
How to Prevent Sterilization Damage
- Always check the manufacturer’s Instructions for Use (IFU) for every instrument type.
- Match the sterilization method to the instrument’s material and design.
- Never guess on cycle settings. Follow validated protocols exactly.
- Keep sterilizer trays loaded within recommended weight and spacing limits.
- Use instrument-specific adapters or connectors for lumened devices when required by the sterilizer manufacturer.
- Rotate staff training on sterilization equipment every year, since protocols and machines can change.
Real-world example: A busy hospital once ran a batch of insulated laparoscopic scissors through a standard steam cycle meant for solid stainless tools. The extra heat exposure weakened the insulation coating. Within weeks, several tools failed insulation testing and had to be pulled from service. A quick IFU check would have caught the mismatch before it became a costly write-off.
Mistake #4: Poor Storage Conditions
What Goes Wrong
Even perfectly cleaned and sterilized instruments can suffer if stored the wrong way. Poor storage leads to:
- Humidity damage, which causes corrosion
- Instruments crushed under heavier trays
- Exposure to dust or contaminants after sterilization
- Shelf-life expiration on sterile packaging going unnoticed
Storage rooms that are too hot, too humid, or too crowded quietly wear down instruments over months and years. This kind of damage is sneaky. It doesn’t show up all at once. It builds slowly until an instrument fails during a case.
Best Practices for Storage
- Control humidity and temperature. Keep storage rooms within manufacturer-recommended ranges.
- Use closed cabinets. Open shelving invites dust and accidental bumps.
- First-in, first-out rotation. Older sterile packs should be used before newer ones.
- Separate heavy and light trays. Never stack sets in a way that puts pressure on delicate tools.
- Label expiration dates clearly. Event-related sterility (not just time-based) still needs tracking.
Why Humidity Is a Silent Killer
Metal instruments and humidity don’t mix well. Even stainless steel, which resists rust better than other metals, can develop surface corrosion when stored in damp conditions for long periods. This corrosion isn’t always visible right away. It can start as tiny pitting on the surface, which weakens the metal over time and creates rough spots where bacteria can hide.
Storage rooms should ideally stay between 68–73°F (20–23°C) with humidity levels below 70%. A simple hygrometer, which measures humidity, can help SPD managers keep an eye on storage conditions without needing expensive equipment. If your facility is in a hot, humid climate, this step becomes even more important.
Mistake #5: Skipping Routine Inspection (Ignoring Mechanical Fatigue)
What Goes Wrong
Every laparoscopic instrument has moving parts: jaws, hinges, ratchets, and cables. Over time, repeated use causes mechanical fatigue. Small stress cracks form. Springs weaken. Insulation thins.
If nobody inspects instruments regularly, these small problems turn into big failures, often mid-surgery. Preventing mechanical fatigue in surgical graspers starts with catching wear early, before it becomes a break.
What to Inspect Before Every Use
- Jaws and tips: Check for alignment, sharpness, and full closure.
- Insulation: Test with an insulation tester, not just a visual check. Cracks can be invisible to the naked eye.
- Hinges and joints: Look for stiffness, grinding, or looseness.
- Cables and linkages: Check for fraying or slack in articulating instruments.
- Lumens: Confirm they’re fully clear with no residue or blockage.
Simple Inspection Schedule
| Frequency | Task |
|---|---|
| Before every use | Visual check, function test, insulation test |
| Weekly | Deep inspection under magnification |
| Monthly | Full biomedical engineering review of high-use trays |
| Annually | Manufacturer service check or recalibration |
Pro tip: Keep a simple log for each tray. Note any wear, repair, or replacement. Patterns in the log often point to a training gap or a sterilization process that needs fixing.
Why Mechanical Fatigue Sneaks Up on Everyone
Mechanical fatigue is different from sudden damage. It doesn’t happen because someone dropped an instrument or used the wrong cleaner. It happens because metal parts flex, open, close, and rotate thousands of times over months of normal use. Each cycle adds tiny stress to the metal. Eventually, that stress turns into a crack, and the crack turns into a break.
This is why “it worked fine last week” isn’t a good enough test. A grasper jaw might function perfectly right up until the moment it snaps mid-procedure. Regular inspection with the right tools, like insulation testers and magnification loupes, catches these problems while they’re still small and fixable, long before they become a surgical emergency.
Comparing the Five Mistakes at a Glance
| Mistake | Root Cause | Main Risk | Fastest Fix |
|---|---|---|---|
| Rough handling | Time pressure, lack of training | Bent shafts, cracked lenses | Foam-lined trays, staff training |
| Reprocessing errors | Skipped steps, dried debris | Corrosion, blocked lumens | Point-of-use cleaning, correct brushes |
| Improper sterilization | Wrong method for instrument type | Insulation breakdown, warping | Follow IFU exactly |
| Poor storage | Humidity, overcrowding | Corrosion, crushed parts | Climate-controlled, closed storage |
| Skipped inspection | No routine checks | Mid-surgery failure | Scheduled inspection log |
The Real Cost of Ignoring These Mistakes
Let’s put this in plain numbers. A single laparoscopic grasper can cost between $200 and $1,000 depending on the brand and function. A full laparoscopic tray can run into the tens of thousands of dollars. Electrosurgical instruments with damaged insulation aren’t just expensive to replace; they carry legal and patient-safety risks if a burn injury occurs during surgery.
Hospitals that build strong reprocessing, sterilization, and inspection habits report fewer emergency repairs, fewer delayed surgeries, and longer instrument lifespans. In short: prevention is always cheaper than repair.
This is exactly why manufacturers like Lapex Surgical, a maker of Surgical, Electrosurgical, Plastic Surgery, and Laparoscopic Instruments based in Sialkot, build instruments with reprocessing durability in mind from the design stage. Choosing well-made tools is the first step. Caring for them properly is what keeps them working for years.
5 Mistakes That Damage Laparoscopic Instruments
And the simple fixes that stop costly repairs before they start.
Where the Damage Really Comes From
Rough Handling & Transport
Bent shafts and cracked lenses from bumps and drops.
Use foam-lined trays and rigid transport carts.
Reprocessing Errors
Dried debris clogs lumens and corrodes metal parts.
Clean at point-of-use, every single time.
Wrong Sterilization Method
Wrong heat or method breaks down insulation.
Always match the method to the instrument’s IFU.
Poor Storage Conditions
Humidity and crowded shelves cause corrosion.
Store in closed, climate-controlled cabinets.
Skipped Inspection
Hidden wear leads to failure mid-surgery.
Inspect and test insulation before every use.
Match the Method to the Instrument
Building a Culture of Instrument Care
Preventing damage isn’t just about following a checklist once. It’s about building habits across your whole team. Here’s how leading OR and SPD teams do it:
- Train new staff hands-on, not just with manuals. Let them practice handling, cleaning, and inspecting under supervision.
- Post visual reminders near reprocessing stations for lumen cleaning steps and insulation testing.
- Hold monthly reviews of instrument damage reports to spot patterns early.
- Partner with your instrument supplier. Companies like Lapex Surgical often offer repair support, IFU guidance, and replacement parts that keep older trays functional longer.
- Reward careful work. Recognize staff who catch problems early, not just those who move fast.
A culture of care turns instrument maintenance from an annoying chore into a shared team responsibility.
Frequently Asked Questions
Q: How often should laparoscopic instruments be inspected?
A: Before every use, perform basic function and insulation checks, plus a deeper weekly inspection under magnification.
Q: What causes most electrosurgical insulation breakdown?
A: Rough cleaning with abrasive brushes, incorrect sterilization heat exposure, and general wear from repeated use without insulation testing.
Q: Can bent laparoscopic instruments be repaired?
A: Some can be realigned by a qualified biomedical technician. Severely bent or cracked instruments usually need replacement for patient safety.
Q: What’s the biggest reprocessing mistake SPD teams make?
A: Letting debris dry on instruments before cleaning begins. Point-of-use treatment right after surgery prevents this.
Q: How long do laparoscopic instruments typically last with proper care?
A: With correct handling, cleaning, and sterilization, many reusable instruments last several years and hundreds of use cycles before needing replacement.
Q: Does sterilization method affect instrument lifespan?
A: Yes. Using the wrong method, like steam on a heat-sensitive part, can shorten lifespan dramatically, sometimes after just a few cycles.
Final Takeaway
Five mistakes cause most of the damage to laparoscopic instruments: rough handling, poor cleaning, wrong sterilization, bad storage, and skipped inspections. Each one is preventable with the right training, tools, and routine checks. Fixing these habits protects your budget, your surgery schedule, and most importantly, your patients.
Quality instruments matter too. Lapex Surgical, based in Sialkot, manufactures durable Surgical, Electrosurgical, Plastic Surgery, and Laparoscopic Instruments designed to hold up under real hospital reprocessing demands, but even the best-made tools need consistent care to last.
Extend the lifespan of your surgical suite’s inventory. Download our complete Laparoscopic Instrument Inspection & Reprocessing Checklist today, or contact our biomedical tech team for a free tray audit.
👉 For any expert advice about our tools, contact our support team now!