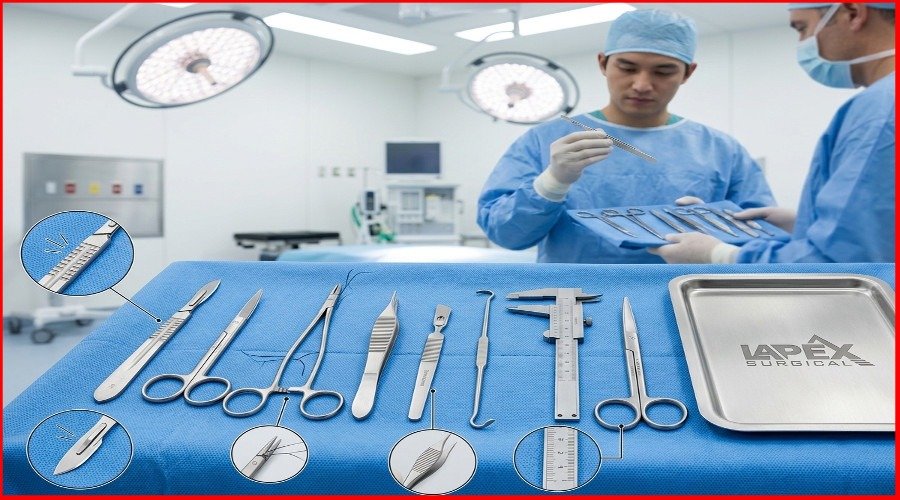
8 Plastic Surgery Instruments Every New Surgeon Should Know: The Ultimate Starter Guide
If you are new to plastic and reconstructive surgery, learn these eight instruments first:
- Adson tissue forceps
- Castroviejo needle holder
- Stevens tenotomy scissors
- Joseph skin hooks
- Ragnell retractor
- Electric dermatome
- Aufricht nasal retractor
- Castroviejo micro-caliper
Together, they cover the basics of most plastic surgery cases: gently holding tissue, cutting fine layers, suturing small wounds, retracting skin, harvesting grafts, and measuring with precision.
If you are buying for a clinic or hospital, look for three things: good stainless steel, tungsten carbide inserts on needle holders and scissors, and a tight, clean tip alignment. Everything below explains why.
Why Plastic Surgery Needs Special Instruments
Plastic surgery works on thin, delicate tissue. Eyelid skin is only a few millimeters thick. A nasal flap can lose blood supply if you crush it. A tiny stitch can leave a visible scar.
General surgery instruments are often too big and too rough for this work. Plastic surgery tools are lighter, finer, and made for small movements.
Here is what sets them apart:
- Smaller tips. They grip tissue without crushing it.
- Lighter handles. They reduce hand tiredness in long cases.
- Finer alignment. Tips meet exactly, so a 6-0 suture does not slip.
- Less tissue trauma. This supports the goal of atraumatic tissue dissection, which means moving tissue gently so it heals well.
A good basic plastic surgery instrument set does not need fifty pieces. It needs the right few, in good condition, that you know how to hold.
Quick Comparison Table
Use this table to see all eight at a glance.
| Instrument | Main Job | Typical Use | Handle Style | Skill Level |
|---|---|---|---|---|
| Adson tissue forceps | Hold tissue | Skin closure, fascia | Flat, spring | Beginner |
| Castroviejo needle holder | Hold the needle | Fine suturing | Round, spring-loaded | Intermediate |
| Stevens tenotomy scissors | Cut fine tissue | Dissection, undermining | Ring or spring | Beginner |
| Joseph skin hooks | Lift skin edges | Flaps, rhinoplasty | Slim handle | Beginner |
| Ragnell retractor | Hold wound open | Small incisions | Double-ended | Beginner |
| Electric dermatome | Harvest skin grafts | Burns, wounds | Powered handpiece | Advanced |
| Aufricht nasal retractor | Lift nasal skin | Rhinoplasty | Single handle | Intermediate |
| Castroviejo micro-caliper | Measure small distances | Eyelid, flap planning | Screw-lock | Beginner |
1. Adson Tissue Forceps
Adson forceps are the most-used forceps in plastic surgery. Learn them first.
Alfred Adson, an American neurosurgeon, gave these forceps their name. They are about 12 cm (4.75 inches) long. They have a slim, flat handle and a fine tip.
Toothed vs. smooth
Adson forceps come in two common styles:
- Toothed (1×2). One tooth on one side, two on the other. These grip skin well with little pressure.
- Smooth or serrated. These are better for delicate tissue, such as vessels or thin flaps.
The Adson-Brown version has a wider tip with several rows of tiny teeth. Some surgeons like it for thicker skin.
How to use them
Hold them like a pencil. Do not squeeze hard. The forceps should guide the tissue, not crush it. A good habit is to pick up the skin edge by the dermis, not the surface.
What to check before buying
- Tips should meet perfectly with no gap.
- Teeth should interlock cleanly.
- The spring should open smoothly.
Example: When closing a facial laceration, a resident lifts the wound edge with a toothed Adson. The tiny teeth hold the skin without leaving a crush mark.
2. Castroviejo Needle Holder
This is the go-to needle holder for fine sutures.
Ramon Castroviejo, a Spanish eye surgeon, designed it. It is now common in plastic surgery, hand surgery, and microsurgery.
Why surgeons like it
Its handle is round and spring-loaded. You roll it between your thumb and fingers, like a pen. That gives you fine control over the needle angle. Ordinary ring-handled needle holders feel clumsy next to it for small work.
Most versions are about 14 cm long. You can get them straight or curved. Many have a locking catch, and some do not. The locking version is easier for beginners because it holds the needle without hand effort.
Tungsten carbide matters here
Needle holders take a lot of wear. Tungsten carbide inserts in the jaws grip the needle better and last longer than plain steel. They are usually marked with gold-colored handles.
Match the holder to the suture
These holders are made for fine sutures, such as 5-0 and smaller. Using them on heavy suture can damage the jaws and cause the needle to twist. Keep a larger needle holder on the tray for thicker sutures.
Beginner tip: Practice on a pad or a banana peel before the OR. Roll the needle through the tissue along its curve. Do not push it straight.
3. Stevens Tenotomy Scissors
These are fine, light scissors for careful dissection and trimming.
They were first made for eye muscle surgery, which is why “tenotomy” (cutting a tendon) is in the name. Plastic surgeons use them for undermining skin, separating tissue layers, and trimming small flaps.
What they look like
Stevens scissors have long, slim handles and short, delicate blades. The tips can be sharp or blunt. The blades can be straight or curved. Most are around 11 to 12 cm long.
Which tip to pick
- Blunt tips lower the chance of cutting something by mistake. They are good for beginners.
- Sharp tips cut finer and cleaner. Use them when you need exact control.
- Curved blades follow body contours, such as the cheek or the nose.
A common beginner mistake
New surgeons often use fine scissors to cut suture thread. That dulls the blades fast. Keep a cheap pair of suture scissors for that job.
Quality checks
Open and close the blades slowly. They should glide with no grinding and no gap along the cutting edge. Tungsten carbide edges stay sharp longer, which helps in busy hospitals where trays are used all day.
Example: During a facial flap, the surgeon spreads Stevens scissors gently under the skin to lift it from the fat layer. Spreading, not snipping, keeps blood vessels safe.
4. Joseph Skin Hooks
Skin hooks let you move tissue without squeezing it.
Jacques Joseph is often called the father of modern cosmetic nose surgery. His name stays on many nasal instruments, including these hooks.
Why hooks beat forceps for some jobs
Forceps squeeze. Squeezing can bruise thin skin and damage a flap’s blood supply. A hook lifts the edge from below, leaving a tiny puncture instead of a crush mark.
Types
- Single-prong: Fine, precise, good for small flaps.
- Double-prong: Spreads the pull across two points.
- Sharp or blunt: Sharp hooks hold well. Blunt hooks are gentler.
Many are about 15 cm long, though sizes vary by maker.
How to use them
Place the hook just under the dermis. Lift gently. Do not pull hard. Pulling too hard can tear the skin or rip a flap.
Your assistant can hold a hook in one hand while you cut or stitch with the other. That teamwork is common in rhinoplasty and facial surgery.
Safety note: Hooks are sharp. Pass them on the tray with care, and never leave them loose under drapes.
5. Ragnell Retractor
The Ragnell is a small, double-ended retractor that holds wounds open.
A retractor holds tissue back so you can see. Large retractors for belly surgery are too big for plastic work. The Ragnell is made for shallow, narrow incisions.
Design
It has a handle with a blade at each end. One blade is usually wider than the other, and the blades are set at an angle. That gives you two sizes in one tool. You flip it over when you need the other one.
Where it helps
- Breast surgery through small incisions
- Skin tumor removal
- Hand and wrist work
- Facial incisions
Tips for new surgeons
- Retract with the edge flat against the tissue. Do not dig in with the corner.
- Ask the assistant to move the retractor as you work. A still retractor can press on tissue for too long.
- Always pad the area if the retractor rests near a nerve.
What buyers should check
Edges should be smooth and rounded. Rough edges can scratch tissue. The handle should feel balanced, not tip-heavy. Lightweight keeps the assistant’s hand steady.
6. Electric Dermatome
An electric dermatome cuts thin, even slices of skin for grafts. It is the most advanced tool on this list.
Burn wounds, ulcers, and large defects often need skin grafts. A split-thickness graft takes the top layer of skin from a donor site, often the thigh, and moves it to the wound. A dermatome makes that slice even.
How it works
A small motor moves a blade back and forth. You set the depth and the width, then glide the handpiece over the skin. Common graft depths are about 0.2 to 0.4 mm (roughly 0.008 to 0.015 inches). Plates and guards come in different widths.
Some models run on batteries. Others run on compressed air. Well-known brands include Zimmer and Padgett.
Why it beats a hand knife
A hand knife needs years of practice. A dermatome gives a more even graft, even for newer surgeons, if the setup is right.
Common setup rules
- Check that the blade is new and seated well.
- Set the depth gauge, then test it.
- Keep the donor skin flat and tight. An assistant helps by pulling skin with boards or gauze.
- Apply a thin coat of lubricant such as mineral oil or saline, as your team prefers.
- Keep steady pressure and a steady speed.
Buying and care
Dermatome blades are single-use in most settings. Handpieces need regular service. Follow the maker’s cleaning and sterilization guide, since powered tools have parts that can trap debris.
Note: Use a dermatome only with proper training and supervision.
7. Aufricht Nasal Retractor
This retractor lifts the skin of the nose so the surgeon can see the structures below.
Gustave Aufricht was a plastic surgeon known for nose work. Some catalogs call the tool an Aufricht retractor, and others call it an Aufricht nasal elevator. The shape is similar: a handle with a broad, curved blade at the end.
What it does
During rhinoplasty, the surgeon lifts the nasal skin off the bone and cartilage. The Aufricht holds that skin up and out of the way. This gives a clear view of the nasal bones, tip, and cartilage.
Some versions come with fiber-optic light attachments. They help in a narrow field where shadows are a problem.
How to use it
- Slide the blade under the skin, not through it.
- Lift in line with the nose, not straight up.
- Keep light, steady pressure.
Heavy pressure can hurt the skin envelope. A damaged envelope can lead to scarring or poor healing.
Buyer’s checks
- A smooth, polished blade with no burrs
- A comfortable handle that does not twist in a gloved hand
- Good steel that does not bend under normal use
This instrument is mostly for surgeons who do nose work, so a general clinic may not need it. A facial plastic or cosmetic practice almost always does.
8. Castroviejo Micro-Caliper
This caliper measures tiny distances so your marks and cuts are exact.
Ramon Castroviejo designed it as well. It looks like a small pair of dividers with a scale in millimeters. A screw locks the setting. Many have a range of about 20 mm.
Where plastic surgeons use it
- Eyelid surgery: measuring lid height and the amount of skin to remove
- Flap planning: marking the edges of a small flap
- Hand surgery: checking small gaps and widths
- Facial symmetry: comparing left and right sides
Why measuring helps
Looking with the eye alone is not enough. A 1 mm difference on an eyelid is easy to see. A caliper stops guesswork and helps you repeat your plan on both sides.
Tips
- Lock the screw before you mark.
- Mark with a fine skin marker, not a thick pen.
- Check both sides twice.
Buyer’s note
Look for a clear, easy-to-read scale and a screw that holds without slipping. Cheap versions can drift, which defeats the purpose.
How to Choose a Quality Instrument
Whether you are a resident buying your first set or a procurement officer filling a tray, the same checks apply.
Material
- Surgical stainless steel resists rust and handles repeated sterilization.
- Tungsten carbide inserts last longer on needle holders and scissors.
- Titanium is lighter and non-magnetic. It costs more.
Finish
A matte or satin finish cuts glare under OR lights. A shiny finish looks nice but can reflect light into the surgeon’s eyes.
Fit and feel
Hold the instrument. It should feel balanced. The tips should close with no gap. The spring should not feel stiff or weak.
Stamps and standards
Look for the maker’s name, a country mark, and a steel grade. Ask about the quality system. Many makers hold ISO 13485 certification for medical devices. Ask for proof when buying in bulk.
Cost vs. life
A cheap forceps that bends after a month costs more than a good one that lasts five years. Plan for the cost over time, not the price on the day.
Where to Buy
Sialkot, Pakistan, is one of the world’s best-known centers for surgical instrument making. Many hospitals around the world buy from workshops there.
One example is Lapex Surgical (the manufacturer of Surgical, Electrosurgical, Plastic Surgery Instruments, and Laparoscopic instruments from Sialkot). Whichever supplier you choose, ask for samples, a clear warranty, and written steel and finish details.
Building a Basic Plastic Surgery Instrument Set
Here is a simple starter list built around the eight tools above.
| Item | Suggested Quantity | Notes |
|---|---|---|
| Adson forceps, toothed | 2 | One more smooth pair is handy |
| Castroviejo needle holder | 1–2 | Add a heavier holder for thick suture |
| Stevens tenotomy scissors | 1 | Pick curved if you do facial work |
| Joseph skin hooks | 2–4 | Single and double prong |
| Ragnell retractor | 1–2 | Different sizes help |
| Electric dermatome | 1 per unit | Only if you do grafts |
| Aufricht retractor | 1 | For nose procedures |
| Castroviejo micro-caliper | 1 | For planning and marking |
Add suture scissors, a scalpel handle, a skin marker, and a few hemostats, and you have a solid base for minor procedures.
Care and Handling Tips
Fine tools last only if you treat them well.
- Rinse early. Blood and tissue dry hard and cause stains.
- Never use harsh brushes. Use a soft brush made for instruments.
- Open all box locks. This lets steam reach every part.
- Keep tips protected. Use tip guards or silicone mats.
- Do not mix with heavy tools. Heavy items crush fine tips in the tray.
- Dry and oil joints. Use a medical-grade lubricant as the manufacturer advises.
- Check every case beforehand. Bent tips and loose screws belong in repair, not in the OR.
8 Plastic Surgery Instruments Every New Surgeon Should Know
Learn these eight first. They cover most everyday cases.
The 8 must-know tools
1. Adson tissue forceps
Hold tissue gently
Beginner
2. Castroviejo needle holder
Grip the needle for fine stitches
Intermediate
3. Stevens tenotomy scissors
Cut fine tissue layers
Beginner
4. Joseph skin hooks
Lift skin without crushing it
Beginner
5. Ragnell retractor
Hold small wounds open
Beginner
6. Electric dermatome
Slice thin skin grafts
Advanced
7. Aufricht nasal retractor
Lift nose skin for a clear view
Intermediate
8. Castroviejo micro-caliper
Measure tiny distances
Beginner
3 checks before you buy
Surgical stainless steel
Resists rust. Survives sterilizing.
Tungsten carbide inserts
Grip better. Stay sharp longer.
Tips that meet exactly
No gap. No slipping.
4 care habits
- Rinse early
- Open all locks
- Guard the tips
- Check before each case
Lapex Surgical
Plastic surgery instruments and micro-kits from Sialkot
Common Mistakes New Surgeons Make
- Gripping forceps too hard
- Using fine scissors on suture thread
- Picking up skin by the outer layer
- Dropping needle holders on hard floors
- Skipping the pre-case check of tips and springs
- Using an instrument for a job it was not made for
Small habits protect your tools, your tissue, and your patient.
Frequently Asked Questions
What are the most important plastic surgery instruments for beginners?
Start with Adson forceps, a Castroviejo needle holder, Stevens tenotomy scissors, and Joseph skin hooks. These cover holding, suturing, cutting, and retracting. Add the other four as your cases require.
What is the difference between Adson forceps and Adson-Brown forceps?
Adson forceps usually have one tooth on one side and two on the other (1×2). Adson-Brown forceps have a wider tip with several rows of small teeth. Adson-Brown holds thicker skin better. Standard Adson is gentler on delicate tissue.
Why use a Castroviejo needle holder instead of a regular one?
Its round, spring-loaded handle allows fine rolling movements. That gives you better control with small needles and fine suture. For heavy suture, a standard needle holder is better.
Are tungsten carbide inserts worth the extra cost?
Usually yes. They grip better and wear slower on needle holders and scissors. Over several years, they often cost less than plain steel tools that need early replacement.
Do I need an electric dermatome as a new resident?
Not for your first set. It is mainly for burn, trauma, and reconstructive units that harvest skin grafts. Most hospitals provide shared units, and training comes under supervision.
How do I know if a surgical instrument is good quality?
Check tip alignment, spring action, finish, and weight. Look for a clear manufacturer mark. For bulk orders, ask for steel grade details and quality certification such as ISO 13485.
Can I use one instrument for many jobs?
You can, but you should not. Using fine scissors on suture thread or a fine needle holder on thick suture shortens the tool’s life and hurts accuracy.
How often should instruments be serviced?
It depends on use. Heavily used trays should be checked at every cycle. Schedule a professional sharpening and alignment check at regular intervals, often yearly for busy departments.
Is this guide a replacement for surgical training?
No. It is a starter guide. Learn each tool in the OR under a trained surgeon, and follow your hospital’s protocols.
Final Takeaway
Eight tools carry a large share of everyday plastic surgery work. Learn how each one feels, what it is for, and how to care for it. Good habits matter as much as good steel.
Equipping your OR or preparing for your next surgical rotation? Explore our complete, premium-grade Plastic Surgery instruments & Micro-Instrument Kits crafted with surgical stainless steel and tungsten carbide inserts. Contact our instrument specialists today to customize your kit!
Lapex Surgical (the manufacturer of Surgical, Electrosurgical, Plastic Surgery Instruments, and Laparoscopic instruments from Sialkot) supports residents, nurses, and buyers with kit planning and custom sets.