How to Choose Precision Electrosurgical Instruments for Surgery: A Clinical & Procurement Guide
To choose precision electrosurgical instruments, start with your procedures, not the catalog. Match the generator (ESU) to your case mix. Pick monopolar or bipolar tools based on tissue risk. Check safety standards, smoke control, and total cost of ownership. Then run a trial in your own OR before you sign anything.
This guide walks you through each step. It is written for procurement officers, biomedical engineers, surgical nurses, OR directors, and surgeons. The language is simple on purpose. Good decisions need clear information.
Quick Answer: The 7-Point Selection Framework
- Define your procedures. List your top 10 procedures by volume.
- Choose the right ESU. Check power range, modes, and safety features.
- Match the tool to the tissue. Use monopolar or bipolar as the risk requires.
- Check electrodes and pads. Return electrode quality prevents burns.
- Plan for smoke. Surgical smoke is a health hazard for your team.
- Verify compliance. Look for IEC 60601 standards and proper documentation.
- Trial before you buy. Let your own team test the tools.
Why Selection Matters
Electrosurgery uses high-frequency electrical current to cut tissue and stop bleeding. It is used in almost every surgical specialty. The current heats the tissue. That heat is the tool. It is also the risk.
A poor choice can cause:
- Deeper tissue burns than planned
- Slow procedures and more bleeding
- Patient burns at the return pad site
- Fires in the OR
- Smoke exposure for staff
- Higher repair and replacement costs
A good choice gives you clean cuts, better hemostasis, less thermal spread, and a safer team.
Step 1: Start With Your Clinical Needs
Before you look at any product, write down what you do. Different specialties need different tools.
| Specialty | Typical Needs | Key Priority |
|---|---|---|
| General surgery | Cutting, coagulation, vessel sealing | Versatile power and sealing |
| Orthopedic | Bone-area bleeding control, deep fields | Strong coagulation, durable tips |
| Neurosurgery | Delicate tissue near nerves | Low-power bipolar precision |
| Plastic surgery | Fine dissection, skin and fat | Fine tips, low thermal spread |
| Laparoscopic | Small ports, limited view | Insulation quality, smoke control |
Questions to Ask Your Team
- Which procedures do we do most?
- Which ones carry the highest bleeding risk?
- Which ones happen near nerves, bowel, or major vessels?
- How many ORs need equipment?
- Do surgeons have strong preferences?
Write the answers down. They become your buying criteria.
Step 2: Understand Electrosurgical Unit (ESU) Selection
The ESU, also called a generator, is the heart of the system. It makes the current. It controls how much power goes to the tissue.
Key ESU Features to Compare
Power output. Check the maximum watts for cut, coagulation, and bipolar modes. More power is not always better. Control matters more than raw numbers.
Waveforms and modes. Common modes include:
- Cut: a continuous current that vaporizes tissue.
- Blend: a mix of cut and coagulation.
- Coag: an intermittent current that seals small vessels.
- Bipolar: current passes between two tips only.
Tissue sensing. Some units adjust power as tissue changes. This helps lower thermal damage and gives steady results.
Return electrode monitoring. The unit should check the contact between the patient and the return pad. If contact is poor, it should alarm or shut off.
Ease of use. Clear screens and simple presets save time. Nurses should be able to set it up fast.
Service and updates. Ask who repairs it, how fast, and how much spare parts cost.
Sample ESU Evaluation Table
| Feature | Why It Matters | What to Look For |
|---|---|---|
| Power range | Fits many procedures | Fine low settings plus strong high settings |
| Return pad monitoring | Prevents burns | Automatic alarm and shutoff |
| Preset memory | Saves setup time | Surgeon-specific saved settings |
| Compatibility | Avoids waste | Works with standard connectors |
| Service support | Limits downtime | Local repair, clear warranty |
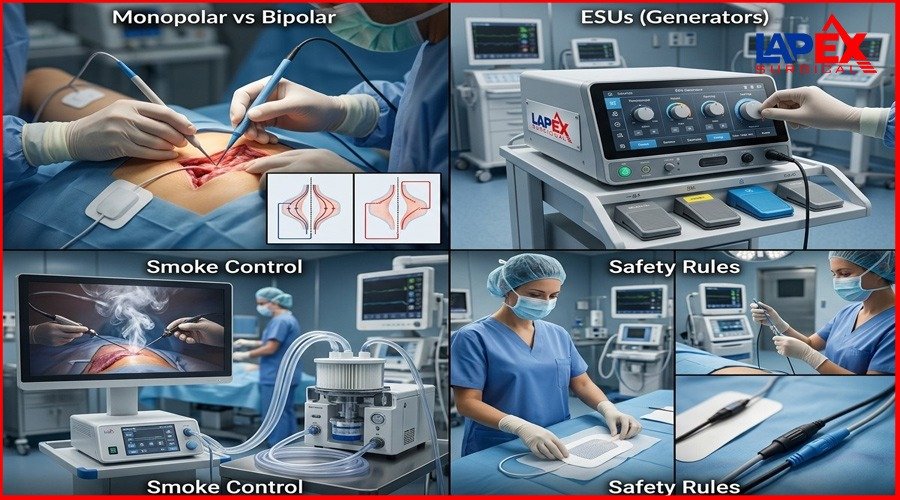
Step 3: Monopolar vs Bipolar Instruments
This is the most common decision. Here is the bottom line: use bipolar when you need precision near sensitive tissue. Use monopolar when you need broad cutting and fast work.
How Monopolar Works
Current flows from the ESU to the active electrode (the tool tip). It passes through the patient’s body. It exits through the dispersive electrode, the return pad on the skin.
How Bipolar Works
Current flows between the two tips of the instrument, such as forceps. It passes only through the tissue held between them. No return pad is needed.
Side-by-Side Comparison
| Factor | Monopolar | Bipolar |
|---|---|---|
| Current path | Through the patient’s body | Between two tips only |
| Return pad | Required | Not required |
| Thermal spread | Wider | Narrow and controlled |
| Cutting ability | Strong | Limited in most designs |
| Best for | Dissection, large-area coagulation | Delicate work, small vessels |
| Risk with implants | Higher concern | Lower concern |
| Risk to nerves | Higher | Lower |
| Typical use | General, orthopedic, plastic | Neuro, ENT, gynecologic, plastic |
Real-World Examples
- Neurosurgery: Bipolar forceps are the standard. The surgeon works near nerves and needs tiny, controlled heat.
- Abdominal surgery: Monopolar pencils cut through layers quickly.
- Patients with pacemakers: Bipolar is often preferred. Always follow your hospital’s protocol and ask the cardiology team.
- Plastic surgery: Both are used. Fine bipolar for small vessels. Monopolar with a fine needle tip for careful dissection.
Practical Tip
Buy both. Most ORs need both types. Choose by case, not by habit.
Step 4: Active and Dispersive Electrodes
The tool tip and the return pad are small parts with a big effect on safety.
Active Electrodes
The active electrode is the part that touches the tissue. Types include:
- Blade: general cutting and coagulation
- Needle: fine, precise cutting
- Ball: broad coagulation
- L-hook or spatula: laparoscopic dissection
- Forceps tips: bipolar grasping and sealing
What to check:
- Insulation that is intact and thick enough
- Non-stick coatings that reduce char buildup
- Secure fit in the pencil or handle
- Smooth, consistent finish
Dispersive Electrodes (Return Pads)
The return pad spreads the current over a large skin area. This keeps the heat low at the exit point. If it fails, the patient can get a burn.
What to check:
- Large enough surface for the patient size
- Strong adhesive that holds in long cases
- Compatibility with your ESU’s monitoring system
- Single-use rather than reused
- Clear placement guide
Placement Basics
- Place on clean, dry, hairless skin
- Choose a muscular area close to the surgical site
- Avoid bony areas, scars, and implants
- Do not place over jewelry or wet skin
- Check contact before and during surgery
Step 5: Advanced Vessel Sealing Devices
Vessel sealing devices use pressure and controlled energy to seal blood vessels. They can seal vessels, commonly up to 7 mm in diameter, depending on the device and its labeling. They often replace clips and ties.
Benefits
- Faster procedures
- Less blood loss
- Fewer foreign materials left in the body
- Consistent seals
Things to Evaluate
| Question | Why It Matters |
|---|---|
| What vessel size is it rated for? | Match it to your procedures |
| Does it cut and seal in one step? | Saves time |
| How much thermal spread does it make? | Protects nearby tissue |
| Is it reusable or disposable? | Changes your cost per case |
| Does it work with your current ESU? | Avoids a second generator purchase |
| Is the jaw design suited for open or laparoscopic use? | Fits the technique |
Always read the manufacturer’s instructions for use. Rated limits are tested under set conditions.
Step 6: Thermal Damage Minimization
Heat that spreads past the target can hurt healthy tissue. This is called lateral thermal spread. It can cause delayed healing, scarring, or nerve injury.
How to Reduce Thermal Damage
- Use the lowest effective power. Start low. Raise slowly.
- Keep tips clean. Char on the tip raises heat and drags tissue.
- Use short activations. Long bursts add heat.
- Choose bipolar for delicate zones.
- Use irrigation where appropriate. Fluid can cool the area in bipolar work.
- Use fine tips for fine work. A big tip spreads more heat.
- Check insulation. Cracks can cause stray current.
Alternate-Site Burns and Insulation Failure
In laparoscopic surgery, damaged insulation can burn tissue outside the camera view. Inspect every laparoscopic instrument before use. Replace any damaged one. Some hospitals use active electrode monitoring systems to catch stray current.
Step 7: Surgical Smoke Evacuation Systems
Electrosurgery makes smoke. That smoke contains chemicals, tiny particles, and sometimes biological material. It smells bad. It can also irritate eyes and lungs. Many professional bodies, including AORN, recommend evacuating surgical smoke.
Standard Mask vs Smoke Evacuation
A regular surgical mask does not fully protect against fine smoke particles. A smoke evacuator pulls the smoke away at the source.
Types of Smoke Evacuation
| Type | How It Works | Best For |
|---|---|---|
| Wall suction with in-line filter | Uses OR suction with a filter | Low-volume smoke, budget setups |
| Standalone evacuator | Dedicated unit with strong airflow and filters | Most open surgeries |
| Pencil with built-in evacuation | Suction sits right at the tip | Capturing smoke at the source |
| Laparoscopic smoke filtration | Filters gas from the abdomen | Minimally invasive cases |
What to Check
- Filter type (ULPA or HEPA-grade, plus activated carbon)
- Filter change cost and ease
- Noise level
- Tubing length and flexibility
- Compatibility with your electrosurgical pencils
- Airflow strength at the tip
Step 8: Operating Room Equipment Compliance
Compliance protects patients, staff, and your hospital. Ask every supplier for proof.
Standards and Documents to Request
- IEC 60601-1: general safety for medical electrical equipment
- IEC 60601-2-2: safety rules for high-frequency surgical equipment
- ISO 13485: quality management for medical device makers
- CE marking or FDA clearance/registration: based on your market
- ISO 10993: biocompatibility, for parts that touch patients
- Sterilization validation: for reusable instruments
- Instructions for use (IFU): clear and complete
- Regulatory approval in your country: for example, DRAP in Pakistan or your local authority
Compliance Checklist
- Certificates are current and match the product
- Serial or lot traceability exists
- Biomedical team has the service manual
- Staff training is included
- Preventive maintenance schedule is clear
- Electrical safety tests are done on delivery
- Reprocessing steps are documented
Step 9: Reusable vs Disposable
| Factor | Reusable | Disposable |
|---|---|---|
| Upfront cost | Higher | Lower |
| Cost per case | Lower over time | Higher |
| Reprocessing | Needed | Not needed |
| Infection control | Depends on process quality | Simple |
| Consistency | Can wear down | Always new |
| Waste | Less | More |
Simple rule: High-volume ORs with a strong sterile processing department often save money with reusables. Low-volume ORs, or those with limited reprocessing, may do better with disposables for certain items. Many hospitals use a mix.
Quality reusable instruments, like forceps and handpieces, should survive many cycles. Ask for the tested cycle count in writing.
Step 10: Total Cost of Ownership
The price tag is only the start. Add up:
- Purchase price
- Accessories and cables
- Replacement tips and pads
- Smoke filters
- Training time
- Repairs and service contracts
- Downtime
- Reprocessing labor and supplies
- Waste disposal
Simple Example
Imagine two forceps:
- Forceps A: costs less, but needs replacement every 6 months.
- Forceps B: costs more, but lasts 3 years.
Over three years, Forceps B often costs less. Always compare cost per procedure.
Step 11: Supplier Evaluation
The maker matters as much as the product. Look at the company behind the tools.
Ask suppliers:
- Where is the product made?
- Which quality system do you follow?
- Can I see test reports?
- What is the warranty?
- How long is delivery?
- Do you offer product trials?
- Who trains our staff?
- Can you supply a full range, not only the ESU?
A supplier that offers instruments, accessories, and support in one place makes ordering simpler.
Lapex Surgical (the manufacturer of Surgical, Electrosurgical, Plastic Surgery Instruments, and Laparoscopic instruments from Sialkot) is one example of a maker that covers several of these needs. Sialkot has a long history of making surgical instruments, and buyers can compare options in one category. You can view the range here: Lapex Surgical electrosurgical instruments.
Step 12: Run a Clinical Trial in Your OR
Never rely on a brochure alone. A trial shows how the tool works in real hands.
How to Run a Good Trial
- Pick 2–3 surgeons from different specialties.
- Choose set procedures so results are fair.
- Train the nurses before the first case.
- Use a scorecard (see below).
- Run for 2–4 weeks.
- Collect feedback from surgeons, nurses, and biomedical staff.
- Review service response during the trial.
Sample Trial Scorecard (Score 1–5)
| Criteria | Score |
|---|---|
| Cutting performance | |
| Coagulation control | |
| Comfort and grip | |
| Tip stays clean | |
| Smoke control | |
| Setup time | |
| Cable and connector fit | |
| Staff confidence | |
| Supplier support |
Common Mistakes to Avoid
- Buying on price alone. Cheap tools can cost more later.
- Ignoring return pad quality. A good ESU cannot fix a bad pad.
- Skipping staff training. Most errors come from setup and handling.
- Forgetting smoke control. It is a safety issue, not a bonus.
- Mixing incompatible parts. Check connectors and voltage ratings.
- Not checking insulation. Test laparoscopic tools before each case.
- Ignoring biomedical input. Engineers know what breaks.
- Skipping the trial.
How to Choose Precision Electrosurgical Instruments
Start with your procedures. Test before you buy.
The 7-Point Selection Plan
List procedures
Top 10 by volume
Pick the ESU
Power, modes, safety
Match to tissue
Monopolar or bipolar
Check pads
Good contact stops burns
Plan for smoke
Capture it at the source
Verify standards
Ask for proof
Run a trial
Your OR, your team
Monopolar vs Bipolar
Monopolar
- Current pathThrough the body
- Return padNeeded
- Heat spreadWider
- Best forFast cutting
Bipolar
- Current pathBetween two tips
- Return padNot needed
- Heat spreadNarrow
- Best forDelicate tissue
Precision near nerves: bipolar. Speed through layers: monopolar.
ESU Must-Haves
- Fine low and strong high power
- Return pad alarm and shutoff
- Saved surgeon presets
- Local repair and warranty
Cut Heat Damage
- Use the lowest power that works
- Keep tips clean
- Use short bursts
- Check insulation every case
Plan for Surgical Smoke
Wall suction + filter
Low smoke, small budget
Standalone evacuator
Most open surgeries
Pencil with suction
Catches smoke at the tip
Ask Every Supplier For
Count the Full Cost
Price + Pads + Filters + Repairs + Training + Reprocessing
Run a 2 to 4 Week Trial
Get the 2026 Procurement Checklist
Or request a free clinical trial for your OR team.
Lapex Surgical, Sialkot
Explore Electrosurgical RangeSafety Basics for Every OR
- Keep a fire-safety plan. Know the fire triangle: oxidizer, fuel, ignition.
- Let skin prep solutions dry fully before activation.
- Use the lowest effective power.
- Place the active electrode in a holster when not in use.
- Never wrap cables around metal tools.
- Check the return pad before the case starts.
- Report all burns and near misses.
Buyer’s Quick Reference Table
| If you need… | Consider… |
|---|---|
| Fine control near nerves | Bipolar forceps, low power |
| Fast cutting through layers | Monopolar pencil, blade tip |
| Sealing larger vessels | Vessel sealing device |
| Less smoke in the room | Pencil with built-in evacuation plus evacuator |
| Lower long-term cost | Quality reusable instruments |
| Easy training | Simple interface and presets |
| Lower infection worry | Disposable high-risk parts |
Frequently Asked Questions
What is the best electrosurgical unit for a small clinic?
A compact unit with both monopolar and bipolar modes, return pad monitoring, and simple presets works well. Focus on safety features and service support more than top power.
Is bipolar safer than monopolar?
Bipolar keeps current in a small area, so it carries less risk of stray current and distant burns. But safety depends on proper use. Each type has its place.
How often should an ESU be checked?
Follow the manufacturer’s schedule and your hospital policy. Many facilities test on delivery, then at set intervals, and after any repair.
Can I reuse return pads?
No. Return pads are single-use. Reuse weakens the adhesive and raises burn risk.
Do I really need a smoke evacuator?
Yes, in most cases. Surgical smoke contains harmful particles and chemicals. Professional guidelines recommend capturing it at the source.
What makes an instrument “precision” grade?
Tight manufacturing tolerances, good insulation, fine tips, smooth finishes, and consistent performance across batches.
How long do reusable electrosurgical instruments last?
It depends on the design, materials, and care. Ask the maker for the tested cycle count. Proper cleaning and storage extend life.
What documents should a supplier provide?
Quality certificates (such as ISO 13485), regulatory approvals, test reports, IFUs, warranty terms, and service details.
Should I buy everything from one supplier?
It can simplify support and compatibility. Still, compare quality and price. Make sure parts work with your existing equipment.
How do I reduce burns during surgery?
Use correct pad placement, keep power low, inspect insulation, keep tips clean, and train the team well.
Final Takeaways
- Start with your procedures.
- Use bipolar for precision and monopolar for speed.
- Check return pads, insulation, and smoke control.
- Demand proof of compliance.
- Count the full cost, not only the price.
- Test in your own OR.
Good electrosurgical tools help surgeons work with care. They also protect patients and staff. Take your time, ask hard questions, and get your team involved.
Working with a maker such as Lapex Surgical (the manufacturer of Surgical, Electrosurgical, Plastic Surgery Instruments, and Laparoscopic instruments from Sialkot) can give you a wider range to compare under one roof.
Next Step
Download our complete 2026 Electrosurgical Equipment Catalog or request a free quote for your next bulk order today.